I spent the MLK 3-day weekend making these Roman shades for our living room:

I used and modified a combination of tutorials from the Little Green Notebook and 365 Days to Simplicity blogs to use the mechanics from cheap vinyl blinds to create custom Roman shades.
I measured my windows and purchased vinyl blinds to fit from Lowe’s for $4.95 a piece.

In the interest of saving some moolah (since I needed to make a total of four shades), I decided to use burlap as my fabric choice. I measured and hemmed the edges to get finished pieces that matched the dimensions of my windows/mini blinds.

I wanted to customize the look a little more, so I also decided to add some coordinating trim to the bottom of each shade. I just measured three inches up from the bottom of each shade and pinned, then top stitched each piece of trim to the burlap.

I had debated on whether the burlap would let too much light through to give us the privacy we desired, and it wasn’t until I had finished all my sewing that I came to the conclusion that it was, in fact, too sheer. So, I picked up some $3.99/yd basic cotton from JoAnn’s (along with a 50% off coupon, oh yeah!) with which to line the back.
I really am a lazy seamstress (sorry, Mom); so since I had already finished the edges on the burlap, I just cut the cotton a little larger than my finished piece of burlap and folded the edges under to hit a little inside of the outside of the burlap.

From there, I pinned the cotton to the burlap and ironed the edges to crease the folds. I top stitched the cotton to the burlap and made sure that my bobbin color blended with the burlap.


Next, I measured and marked where I needed to hand-sew the drapery rings.

Little Green Notebook’s tutorial recommends making folds every 10 inches, but I found that my material was just too thick to fold well with those dimensions. In order to get my first draft to hang and fold right, I ended up needing to skip every other ring. So, I found that spacing my folds every 20 inches seemed to work well for this project.


(Note: this pic shows the first draft with drapery rings every 10 inches; however I ended up only using every other set so that my rings were 20 inches apart, resulting in 10-inch folds.)
I took the mini blind and cut off the plastic piece at the bottom.

Then I snipped all of the ladder strings being careful to avoid the main pull cords.

I pulled all of the vinyl slats off leaving me with the top valance and pull cords.


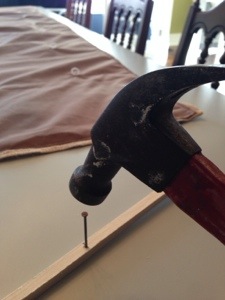
I then took a piece of balsam wood I had purchased at Lowe’s and cut to the width of my shade, and marked on it where the pull strings would fall. I used a nail to make a starter hole, then hand-screwed the screw eyes into place.

Next, I glued the balsam wood onto the shade. Since I wanted to ensure that the trim would be seen when the shade was lifted, I glued the balsam wood 22 inches from the bottom of the shade.

I used Liquid Fusion (which I picked up at Michaels’; it worked wonderfully) to adhere the wood to the fabric, and I used a few cans of vegetables as weights while it was drying.


In the meantime, I glued the valance to the top of the shade using hot glue (I found this worked better than the Liquid Fusion since it was difficult to brace.) I wanted the tops of the shades to look seamless, so I folded the fabric around to the back of the valance and glued in place.


I trimmed up any extra fabric so that it would be even with the valance.

Once all of the glue was dry, I threaded the pull cords through the drapery rings, and tied them to the screw eyes in the balsam wood pieces.


After that, it was just a matter of hanging them using the hardware included in the mini blind packaging.
BEFORE

AFTER

I’m very happy with the way they turned out and how they seem to “finish” the room, but in the spirit of full disclosure, I did have to futz with a couple of them since they seemed to hang a little crooked once I got them up. Who knows if it was my lazy cutting/sewing or how I hung the hardware, but I just used straight pins to pull the fabric up a little on the sagging side and secure out of sight.

And, see, if I hadn’t of told you, you never would have known! 😉

They look wonderful, Julie! What artistic talent you have—but then we knew that. 😉
You’re too sweet! Thank you, Brooke!
Love these!!! Very talented & crafty lady you are … 😍
Thank you!
Love love your custom shades. You did a really good job.
🙂
Why do you sew the drapery rings on each fold (10 inches)? Didn’t you need to sew it to every other fold? When you rase up your shades how wide are the folds? 5 inches then?
I originally sewed the drapery rings 10 inches apart because I was adopting the process used by The Little Green Notebook; however, I ended up abandoning every other set so that my rings ended up 20 inches apart and my folds were 10 inches. This worked much better for my material and the look I was after. I apologize if that wasn’t clear in my instructions. I think the old picture of the rings spaced 10 inches apart certainly adds to the confusion. Unfortunately, that was the only picture that I took of the rings (silly me), but I will make an edit in the post to clarify for future readers. Thanks for the question! 🙂