Every year I throw a crazy Halloween Party with a different theme. This year I decided to keep it classic with a “Funeral Parlour/Morgue” theme. Since I already knew early on in the year that this was the theme I was going with, I was able to give part of it a trial run by throwing my sis-in-law a Faux Funeral Birthday for her 50th over the summer (you can see the post from that party here.)
Welcome to the McCroaker Funeral Parlour (I know, groan!)

For the approach to the house, one must pass the adjoining cemetery, of course, complete with a family plot (sectioned off with plastic landscaping dividers), a styrofoam “stone” wall that I inherited from an old Sound of Music production, a collection of gravestones that I both thrifted and purchased new, a pair of vintage fences that my friend, Tammy, at the Junktion let me borrow, and Mr. Bones as the Undertaker.


I placed a few green spotlights strategically and hid my fog machine behind the stone wall. I used my method of frozen water bottles placed in a dryer vent to cool the fog so that it would lay low and be extra creepy.

Photo courtesy of Jennifer Mohney

Photo courtesy of Travis Menke
I decided to convert my living room into the actual funeral parlour by turning my couch into a coffin and setting up my dining room chairs for the “viewing”. (You can see more details of how I made the “coffin” here.) To mask my bookshelf, I hung cheap black sheets that I purchased, using command hooks and clip on rings. I also hung mosquito netting that I’ve had since college and added some lace to the top to mimic Victorian coffin displays. I was going for looks like this:


Add a hidden speaker playing organ music, a candelabra, and a couple of funeral wreaths (made from Dollar Tree silk flowers and foam circles), and you’ve got yourself a funeral!


Photo courtesy of Travis Menke
To encourage people to engage and have fun with the “coffin”, I also added a kitchy “photo booth” sign that included a note to “lie down and take a pic, if you dare”.

Since I had to move most of the furniture out of my living room to give the feel of a proper funeral viewing, I set up a seance-style seating area on the other side of the room which included a couple of winged back blue velvet chairs, candles, a palm reading book, and a skeleton hand holding a “crystal ball” (actually just a glass paperweight).


Photo courtesy of Jennifer Mohney
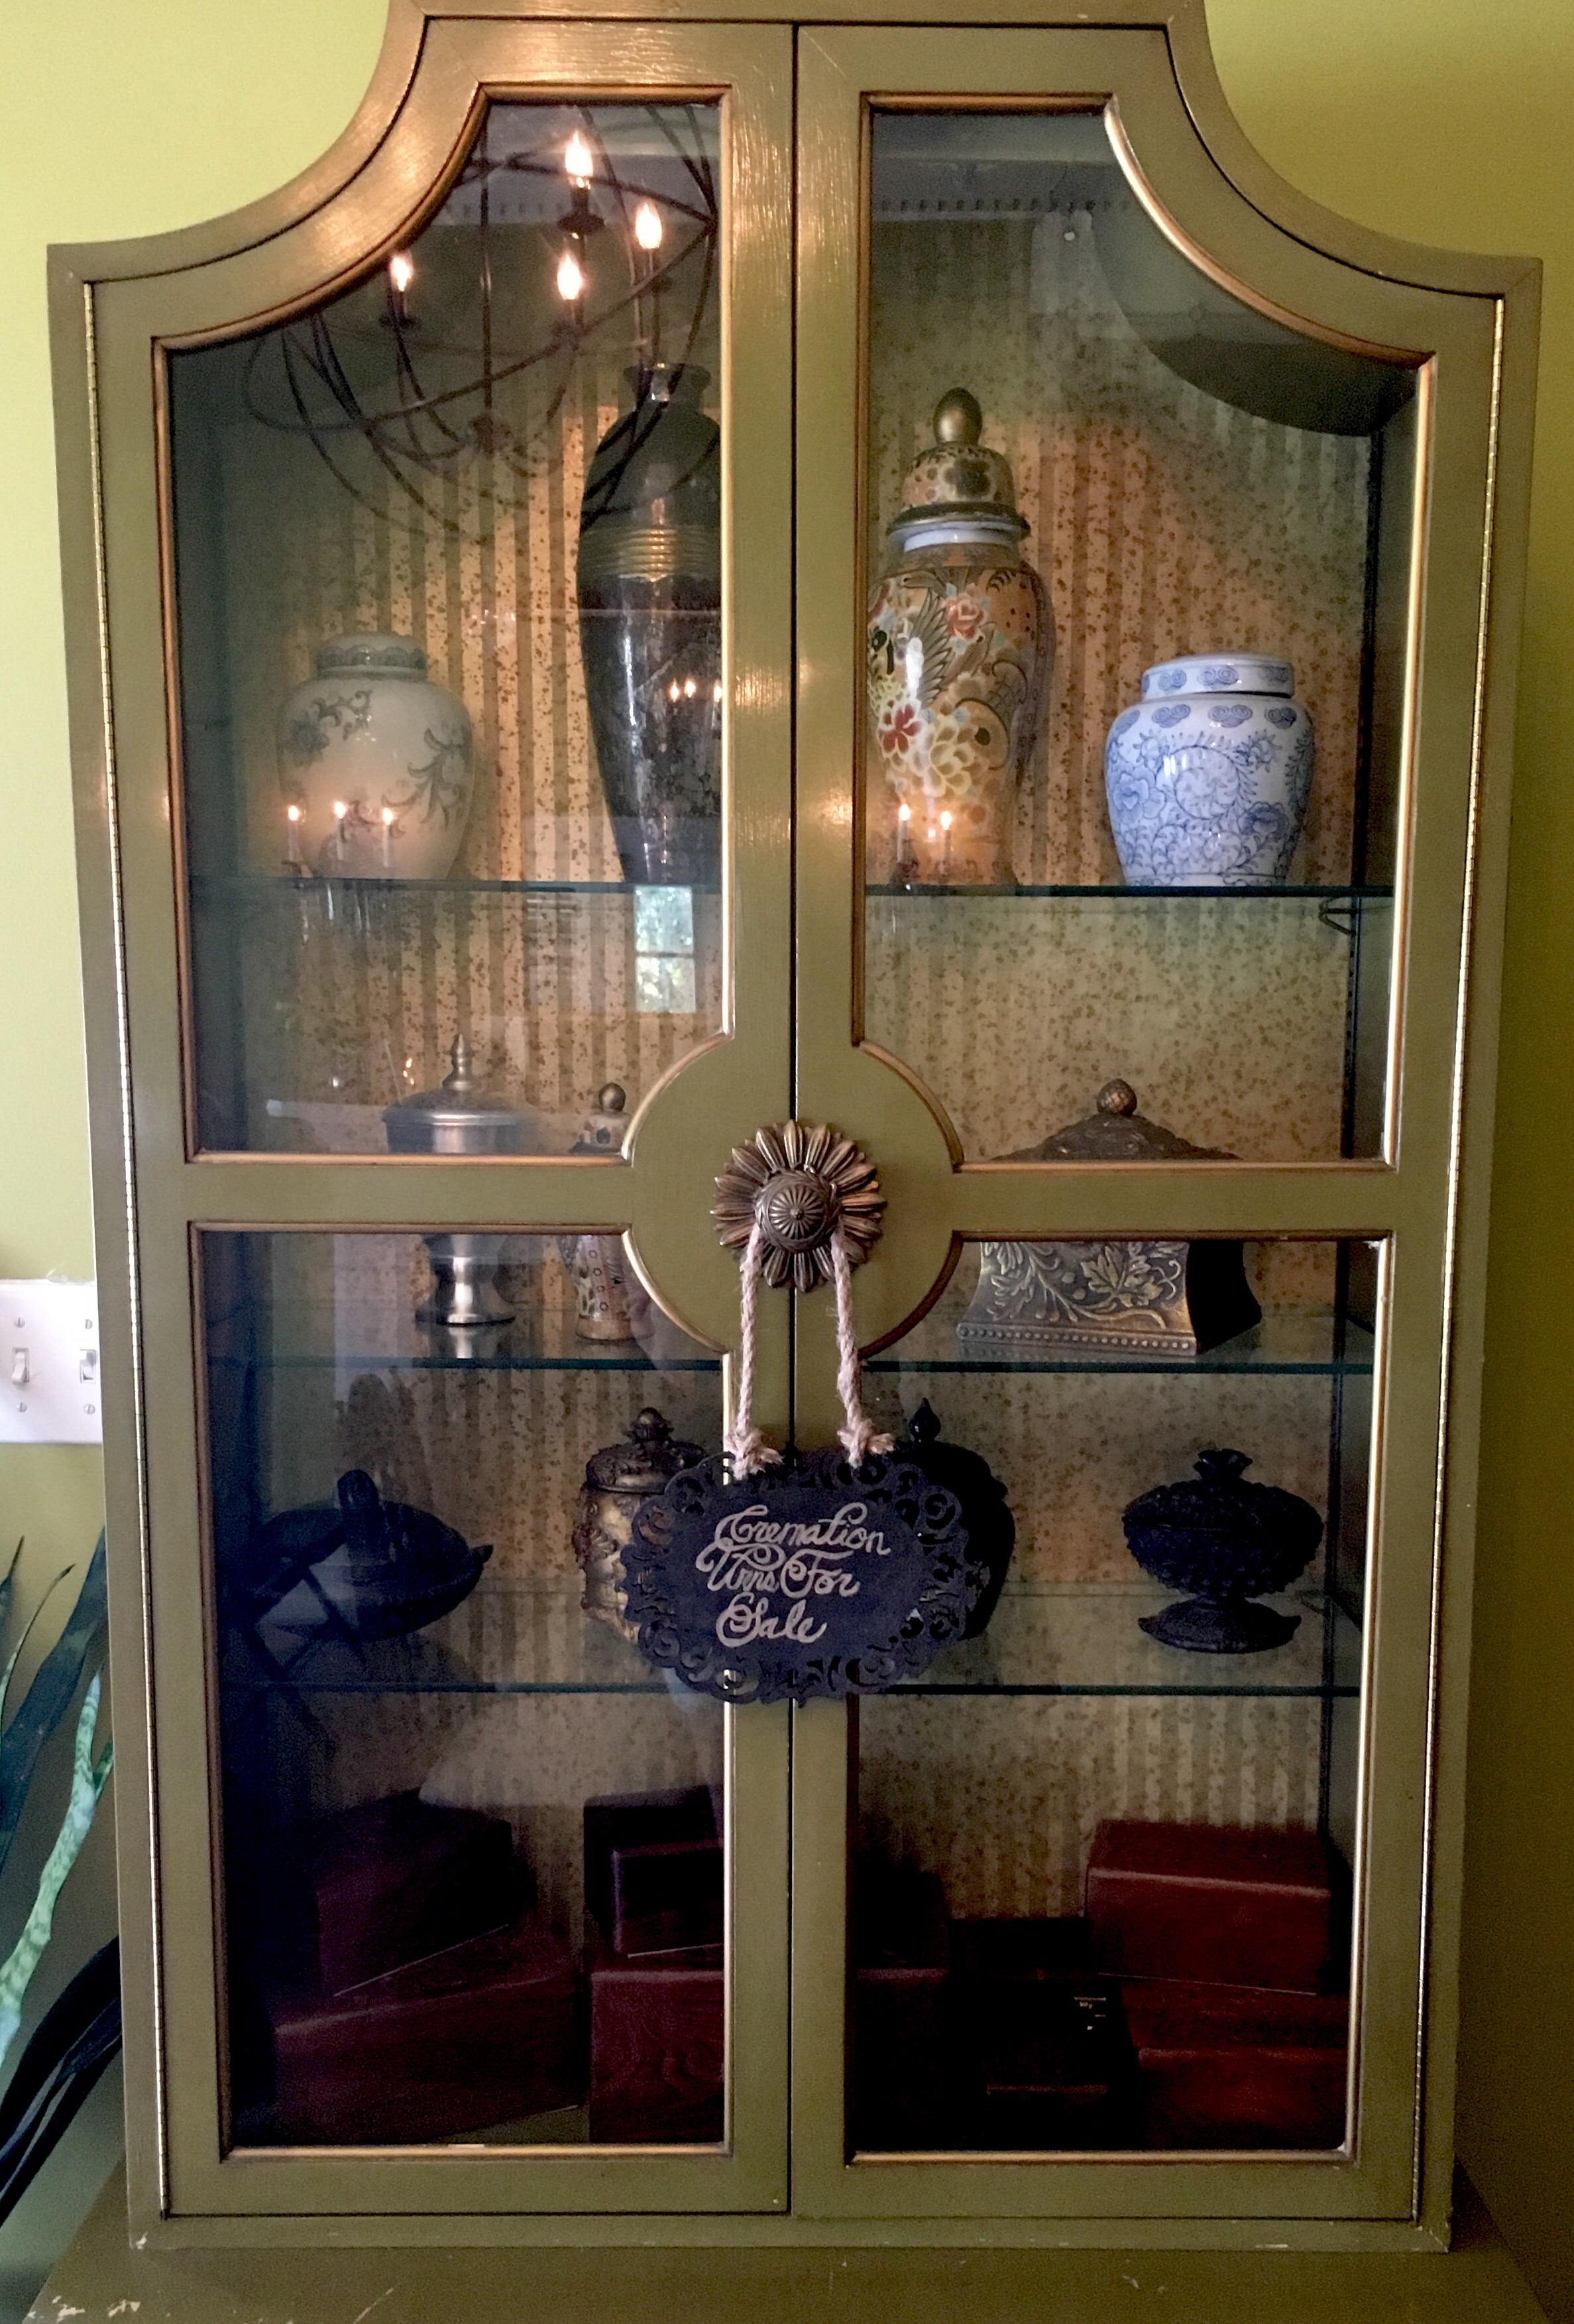
I also brought back the cremation urn display which utilizes my living room curio.
Lastly, I covered my way-too-modern-for-this-look credenza with a black cloth and added a Victorian-ish lamp, a praying hands figurine, kleenex, and, of course, calla lilies.

Then on to The Morgue (otherwise known as my dining room)…
I converted my dining room table to an embalming table by laying a 4×8 insulation board (one that already had one side that was metallic) on top and attaching foam pipe insulation, which is already pre-sliced and makes it easy to just slide onto the outside of the insulation board.

Then, I needed a life-sized body to go on the table, of course. I somehow talked my husband into letting me duck tape his torso and legs so that I could get a “base” form (not without a whole lot of whining and griping, mind you.) This required finding the longest t-shirt I could and duck-taping around his body, while overlapping pieces. I cut a slit up the back after I finished the torso so that he could slide out, and then I re-taped it afterwards. (This is basically the concept.)

Then came the legs, and in a pinch… I put pantyhose on him. Yep, ladies’ pantyhose. But, er… I wouldn’t recommend this, as it can be a little painful when removing. If I was to do this again, I would probably have him wear thicker leggings to protect his hairy man legs (of course, who are we kidding? He’s never gonna let me do this again! Hahahaha!) I very, very carefully cut slits up the back of each leg, peeled it off of him, and then re-taped up the back of the legs. I stuffed both with poly fiberfill…


…and then attached them to make a full torso and legs. If I could have, I would have had him put on sleeves so that I could make the arms, but I felt that I was already pressing my luck, as it was (and for some reason wasn’t prepared with sleeves at the time of initial taping); so I improvised with the sleeves of a long-sleeved t-shirt. I will say, they came out pretty lumpy; so, if you are ever going to try this crazy project, get your model to let you put sleeves on them and then follow the same directions as the legs.


I knew I wasn’t even going to try to make hands or feet. So, for those, I ordered what I needed off of the internet and attached them using, you guessed it – duck tape! I also knew that I wanted to have one of my food items be in the shape of a hand, so I actually only ordered one hand and made one of the arms a nub.


(It really cracked me up that because I had to order two completely different feet in order to have both a right and left, one of them ended up being quite a bit smaller than the other! Hahaha!)
For the head, I just used one of the foam wig heads that you can get from Sally’s or a craft store and attached a full-face mask that I found at Goodwill which I thought had better facial definition than the foam head.


Once the body was assembled, I used this papier mache’ technique to cover the entire thing (except the hands and feet) and get a uniform look.


I then painted everything in a skin tone and followed up with some shadowing and bruising to give him a little more depth.


I topped him off with a wig I found thrifting, that I cut to make a little shorter (yeah, this guy is apparently a Justin Bieber fan!) And I lovingly called him “Ducky” (until he got his “John Doe” toe tag!)


I covered my chandelier in a sheet and hung a ring light (that I had purchased a battery pack for) from the disguised chandelier to make it look more like an examining table.

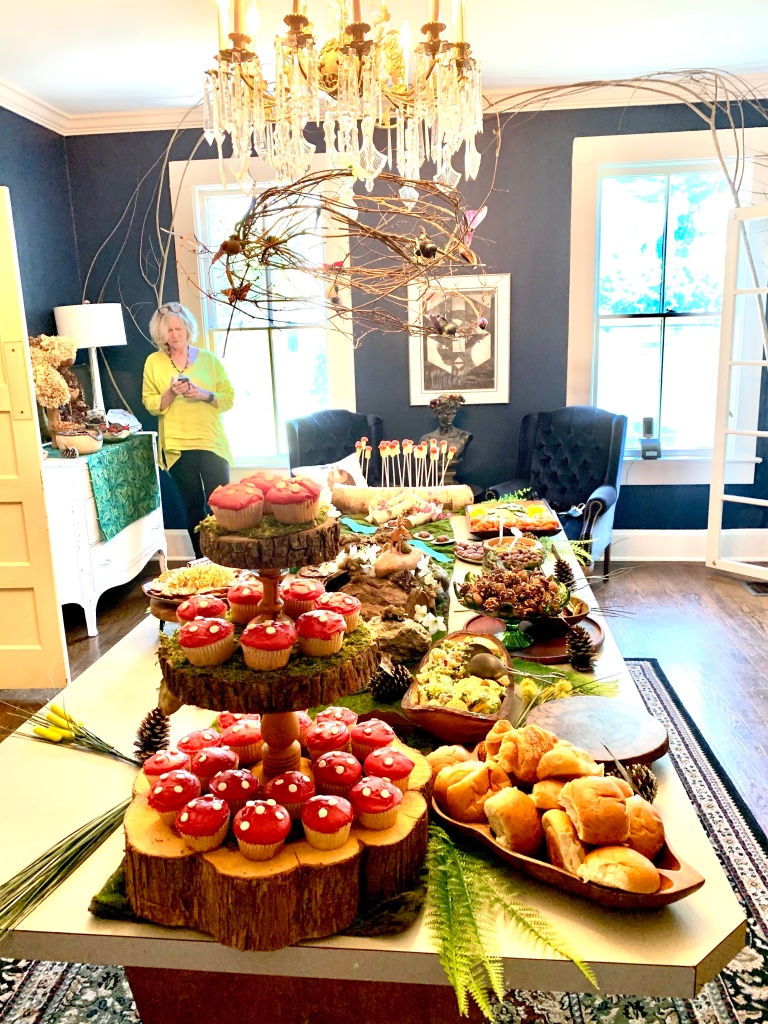
And then I surrounded Ducky with food that hinted at (or downright looked like) his internal and external body parts:
Heart – vegan cheesecake made in a heart-shaped jello mold (you can purchase the mold here). This is the recipe I used.

Hand – smoked salmon dip made in a jello mold (you can purchase the mold here)

Brain – vegan cream cheese dip in a jello mold (this mold I purchased at the Dollar Tree) – also, I didn’t use enough gelatin so it came out more like an “exploded brain”. Oh, well…
Ribs – sliced pizza
Liver – crescent dough encrusted Brie (cut into the shape of a liver) with strawberry-fig preserves

Kidneys – kidney bean salad (here is the recipe I used. Mmmmmm.)
Eyeballs – mozzarella balls marinated in sundried tomatoes and herbs with olive irises/pupils (I used this recipe. They were delicious!)
Vertebrae – sliced tortilla pinwheels

Eeeeeek! This is so out of focus, it’s almost too scary to post!
Intestines – cinnamon roll dough rolled out into a “rope” and covered in icing and some beet jelly that I had on hand
Testicles – mushroom ravioli
Toes – Smart Dogs cut in half with a half-moon cut out for the toenail and small slits cut for the knuckles
In addition to what I already owned, I thrifted for additional enamelware and other items that I could serve the refreshments on/in that would appear clinical, such as aluminum pizza pans and small square cake pans.

Photo courtesy of Joe Munroe

Photo courtesy of Jennifer Mohney

Photo courtesy of Michelle Sweeney

Photo courtesy of Dawn McMillan

Photo courtesy of Irene Olson

Photo courtesy of Dawn McMillan

Photo courtesy of Travis Menke

Photo courtesy of Michelle Sweeney
And to identify the food, I made “toe tag” labels (I found an image online and doctored it a bit to make it more generic) that I clipped to wires using mini clothespins and placed in various small glass bottles. Each label featured the body part, as well as what the actual food was and whether it was gluten free (GF) and/or vegan (V).


For the “signature cocktail” of course I had to resurrect the “Embalming Fluid” from my sis-in-law’s party. It is basically just a jug of Green Berry Rush Hawaiian Punch, a container of pineapple juice, a 2-liter of Sprite, and about a liter of vodka. The sign I made by printing out an image I googled and modge-podging it onto a blank wooden sign I had stained. A little plastic tubing wrapped around the pour spout furthered the embalming concept.

I also decanted all of my essential liquors into old-fashioned bottles and hung metal liquor tags on each one for identification.

A morgue wouldn’t be complete without cold storage for the dead bodies. So I took another piece of insulation board and cut it to fit the front of my mid-century bar cabinet. I wanted to disguise as many pieces as possible without having to move or remove them, so this was the plan to disguise this piece.

I used some of the insulation board that was cut off to make squares for the “doors” and glued them on with liquid nails. I attached metal door handles with hot glue, and I printed out ID numbers, nameplates (on which I wrote in “John Doe” and “Jane Doe”), door hinges, and a temperature gauge and glued all of those on using paper glue.


As I said before, I wanted to remove as little as possible. So, I hung anatomical posters directly over my existing artwork.


And I cut parchment paper to size and attached it inside the glass doors of my built-in china hutch to give the impression of a medical cabinet. (I had battery operated lanterns inside to illuminate it, as well, but I TOTALLY forgot to turn them on until the very end of the party. Doh!)

I also googled body part x-ray images and printed them out on 8.5×11 paper and hung them on my mirror (to give the impression of a light box)…

…as well as hung them from string draped behind my organ removal vignette.

I was able to utilize all of the vintage microscopes that a friend gifted me several years ago, and some of the lights even still worked!


Photo courtesy of Travis Menke
I thrifted for any kind of tool or kitchen gadget that looked like it could be used to remove organs or manipulate the body in some way, and I placed everything on aluminum trays that I purchased at the Dollar Tree (I found some that were perforated which I thought would be perfect for “draining blood”, so I just set them on top of regular aluminum trays, and voila!)


Photo courtesy of Jennifer Mohney
My friend, Tammy, also let me borrow a hospital privacy screen for the party. So I bought some cheapo white shower curtains and rings from the Dollar Tree and hung them on the divider to look like fabric curtains. I also hung one from a suspension rod to mask my little craft room where I was storing a few things I didn’t want seen. And while I was at the Dollar Tree, I bought a clear shower curtain, as well, and cut it into strips. I hung that from a suspension rod, as well, to hang between the dining room and kitchen to look like the entrance to another cooler and to complete the last of the room transitions.


Other than that it was just little finishing touches like more vignettes, microscopes, etc.


Of course, it wouldn’t have been a funeral without the mourners…

Photo courtesy of Michelle Sweeney

Photo courtesy of Travis Menke

Photo courtesy of Michelle Sweeney

Photo courtesy of Janet Sink

Photo courtesy of Travis Menke

Photo courtesy of Scott Sweeney

Photo courtesy of Dawn McMillan

Photo courtesy of Travis Menke

Photo courtesy of Michelle Sweeney

Photo courtesy of Travis Menke

Photo courtesy of Joe Munroe

Photo courtesy of Michelle Sweeney

Photo courtesy of Dawn McMillan (taken by Bek Millhouse)

Photo courtesy of Janet Sink

Photo courtesy of Travis Menke

Photo courtesy of Dawn McMillan

Photo courtesy of Michelle Sweeney

Photo courtesy of Irene Olson

Photo courtesy of Travis Menke

Photo courtesy of Travis Menke

Photo courtesy of Irene Olson

Photo courtesy of Joe Munroe

Photo courtesy of Michelle Sweeney
And with that, another Halloween Party was “laid to rest”!

Photo courtesy of Jennifer Mohney